The following article is about making birdhouses out of cans, flower pots, and wood. The instructions and illustrations were originally published in 1916.

Homes For Birds
It is every one’s duty to look to the protection of our rapidly disappearing bird, and I want every reader of this article to put up at least one nesting box this spring in some place secure from cats and other bird enemies.
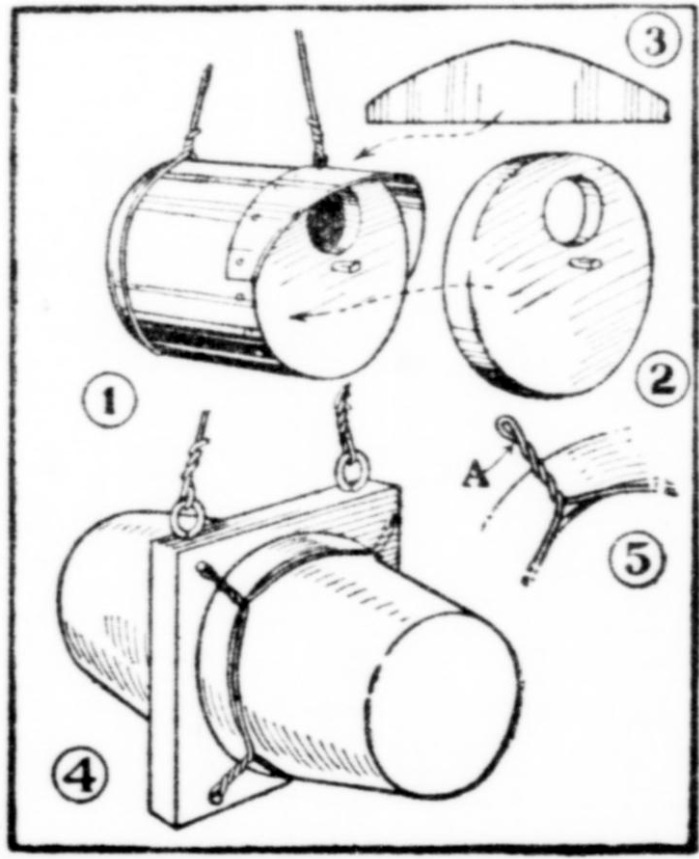
Tin cans, flower pots, boxes – I could name a hundred pick-up materials that can be used. The house in Fig. 1 requires a tomato can. Cut a wooden disk to fit snugly in the opened end of the can (Fig. 2), and bore a hole through it for a doorway – seven-eighths inch in diameter for a wren house or one and one-half inches in diameter for a bluebird house. Fasten the disk in the end of the can with short nails. Then make a canopy out of a piece of tin of the shape shown in Fig. 3, and fasten it over the doorway.

The double apartment bird house in Fig. 4 is a suggestion for utilizing flower pots. Get two pots of equal size. The bottom holes must be large enough for doorways, and can be enlarged with a file or by chipping away the flower pot.
Cut a square piece of board a trifle larger than the pots to fasten the pots to (Fig. 4), then pass a loop of wire around each pot, making the loop large enough so it can be twisted in four places into straps (A, Fig. 5).
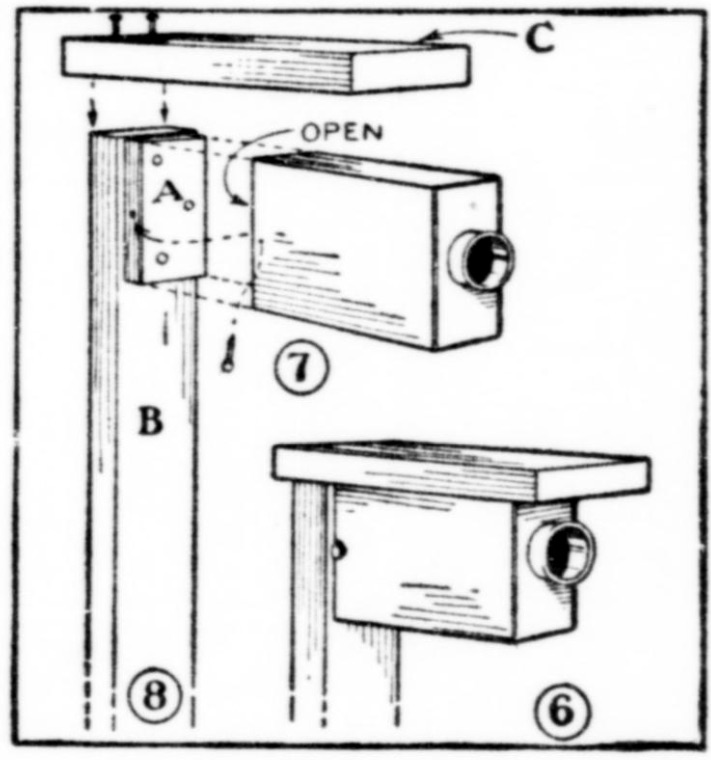
The mouth of a varnish can is a splendid opening for a bird house doorway, as you can readily see by the house shown in Fig. 6. Any painter will give you an empty can. Remove the bottom (Fig. 7), cut a block of wood to fit in this open end (A, Fig. 8), nail this block to the side of a long pole support (B) about one-sixteenth inch below the top, and fit the varnish can over this black. For a roof, nail one end of a short board to the top of post B (C, Fig. 8).
Pierce a hole through each side of the can, and in block A, for a short nail, to hold the varnish can in place (Fig. 8).

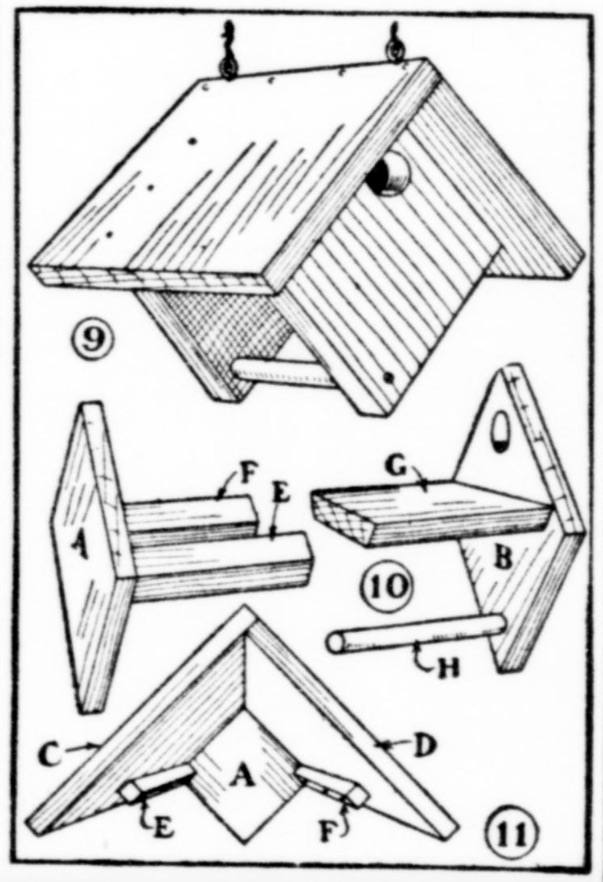
The wooden house in Fig. 9 is simpler to construct that the illustration might lead you to suppose. Cut end pieces A and B (Fig. 10) eight inches square, and roof boards C and D 12 inches wide – C 11 inches long and D enough shorter to allow for the lapping of C over the edge of D (Fig. 11). Nail C and D, then nail the two to end A, allowing a projection of 2 inches. Do not nail the roof to end B, because that end is to be removable to provide for cleaning the inside of the house. Cut E and F (Fig. 11) six inches long, and nail them to under side of the roof boards with their ends even with the corners of end A. Then cut the floor board G with beveled edges to slide between E and F (Fig. 10).
Cut the perch stick H to fit between ends A and B, and fasten it with screws.
Source: The herald. (New Orleans, La.), 04 May 1916.

