
The embroidery pattern below for coat collar and cuffs was originally printed in 1912.
Embroidery Design for Coat Collar And Cuffs
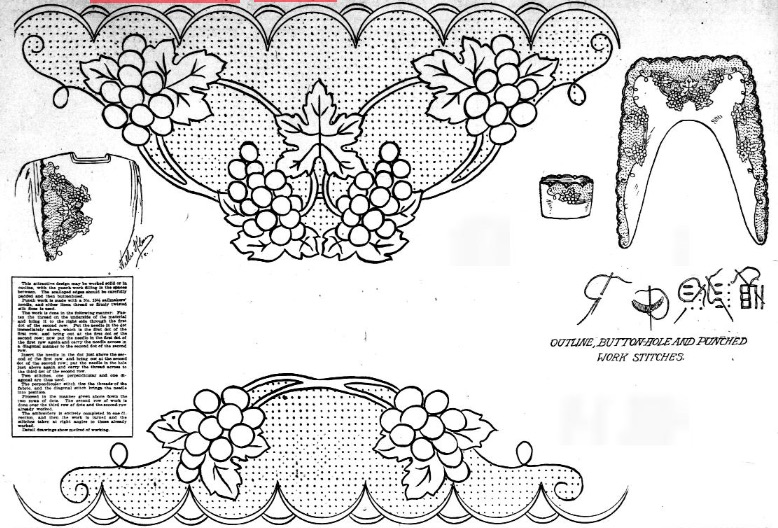
This attractive design may be worked solid or in outline, with the punch work filling in the spaces between. The scalloped edges should be carefully padded and then buttonholed.
Punch work is made with a No. 15-1/2 sailmakers’ needle, and either linen thread or firmly twisted silk floss is used.
The work is done in the following manner: Fasten the thread on the underside of the material and bring it to the right side through the first dot of the second row. Put the needle in the dot immediately above, which is the first dot of the first row, and bring out at the first dot of the second row. Now put the needle in the first dot of the first row again and carry the needle across in a diagonal manner to the second dot of the second row.
Insert the needle in the dot just above the second of the first row, and bring out at the second dot of the second row; put the needle in the hole just above again and carry the thread across to the third dot of the second row.
Two stitches, one perpendicular and one diagonal are thus used.
The perpendicular stitch ties the threads of the fabric, and the diagonal stitch brings the needle into position.
Proceed in the manner given above down the two rows of dots. The second row of work is done over the third row of dots and the second row already worked.
The embroidery is entirely completed in one direction, and then the work is turned and the stitches taken at right angles to those already worked.
Detail drawings show method of working.
Source: The Washington herald. (Washington, D.C.), 18 Aug. 1912.
