

Collecting moths and butterflies was a popular hobby in the past, but with the dying populations at present, I am placing this info up for research purposes only. Capturing butterflies for tag and release can be done with a homemade net described below.
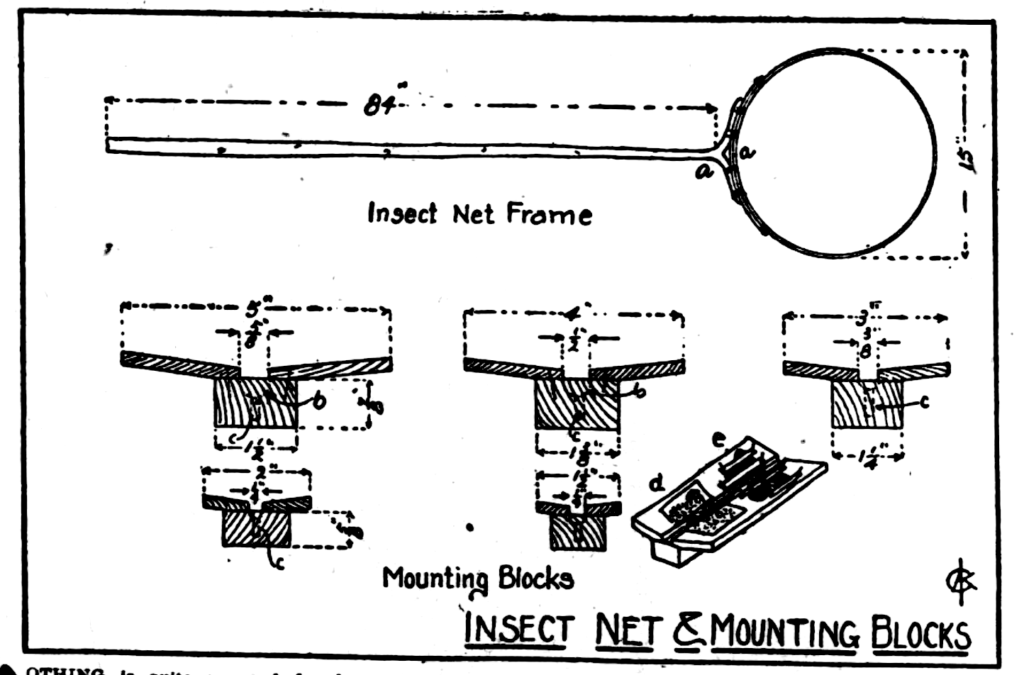
Insect Net and Mounting Blocks
Nothing is quite to good for growing boys or for overworked men and women as healthful out-of-doors hobbies which are entirely different from their daily occupations. The writer submits the proposition that no other hobby satisfies the collecting instinct, gives more interesting out-of-door exercise, can be so easily applied anywhere, and which requires so little experience as the collecting of insects.
Butterflies and moths are the most interesting of all insects to the young collectors. The first need is a collectors net which may be made by making a loop of thin, tough wood; a barrel hoop will do very well if it is worked down. Soak the pieces overnight and bend them into a round form until they are dried. Then they will hold their shape. A handle may be made of a small, straight sapling with a fork on the upper end, the branches of which may be bent open and the inside of the fork whittled straight as shown. The handle and hoop may be joined with wire or strong twine as shown. The hoop may be covered with canopy lace or mosquito netting. Be sure the bottom is round for insects will get into the corners and be bruised. A spring steel or brass wire hoop with an ordinary handle is to be preferred, but the one described will do for the beginner.
There is no more fascinating sport for the amateur who has the insect collecting bug than to spend his spare time in the fields and woods and at night with a strong light, many beautiful moths may be caught, but the space available will not permit a discussion of how and where to collect.
Mounting blocks are necessary if the collection is to be properly cared for. Their construction and use are shown in the sketch. The dotted curve at “b” of each block indicates a groove cut out below the surface of the block to receive the body of the moth or butterfly, while the wings are being spread and dried. The different sizes of grooves are for the large or small bodies. A hole should be bored at “c” of each block and a piece of cork glued in it to receive the pin upon which the insect is impaled after it has been killed in the cyanide [NOTE: Ethyl acetate is widely used for this today.] jar and which holds the body in place wile the wings are being spread. Usually the wings are drawn forward by a needle through the strong front edge of each wing until the back edges the front wings are straight across, when they are held in place by a piece of glass as at “d” or by pinned strips of paper as at “e”. Some collectors use a single block for each insect while others prefer a block large enough to receive several. The advantage of the single block is that the glass or piece of paper large enough to cover each pair of wings may be tied on with strings, thus insuring no change while the block is being handled.
Source: The Rock Island Argus and daily union. (Rock Island, Ill.), 08 July 1922.
