
The instructions below for making a camp wagon were originally published in 1918.
This is a great craft project for older kids who are studying early American history.
A Camp Wagon
First you must get two pairs of wheels. If you haven’t any, you will most likely find a boy who is willing to sell his wheels or make a trade. By laying flat upon the ground you can determine the proportions necessary for a wagon to sleep in. The iron axles that belong to your wheels will probably be too short. To lengthen them, get a piece of iron pipe just large enough for them to slip into. Go to a blacksmith or a machinist, and have him first cut each axle in half, and the iron pipe in two pieces of the width of the wagon box, and then rivet the axle halves in the ends of the pipe (Fig. 10).
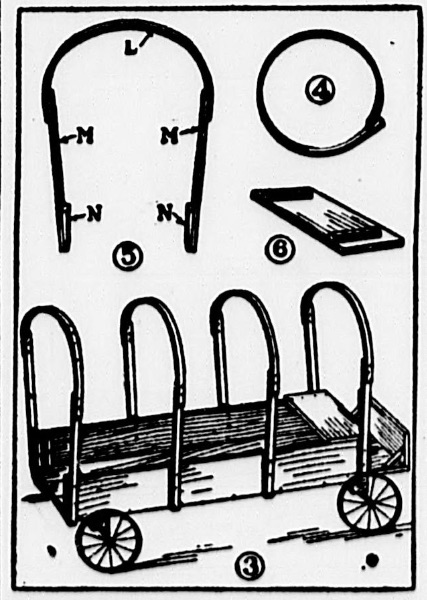
Fig. 7 shows the wagon bed. Fasten the boards together by means of the two-by-four crosspieces A and B. Then cut the side boards C and D and nail them to the edges, and cut the end boards E and F to fit between. Fasten end E between the sides, and form grooves by means of the strips G (Fig. 8) for the end F to drop into. Dashboard H is of the same size as E. Brace it with the brackets I.
The wheel axles must be stapled to the two two-by-fours J and K (Fig. 9). Make these pieces of the length of crosspieces A and B (Fig. 7). Nail J to crosspiece A, and pivot K at its center to crosspiece B with a carriage bolt long enough to extend through K, B, and the wagon bed. Enlarge the hole in K so the bolt head will set down flush and allow the iron axle to pass over it. In bolting on the front wheels, slip an iron washer over the carriage bolt so that it will come between crosspieces K and B, and place another next to the bolt nut.
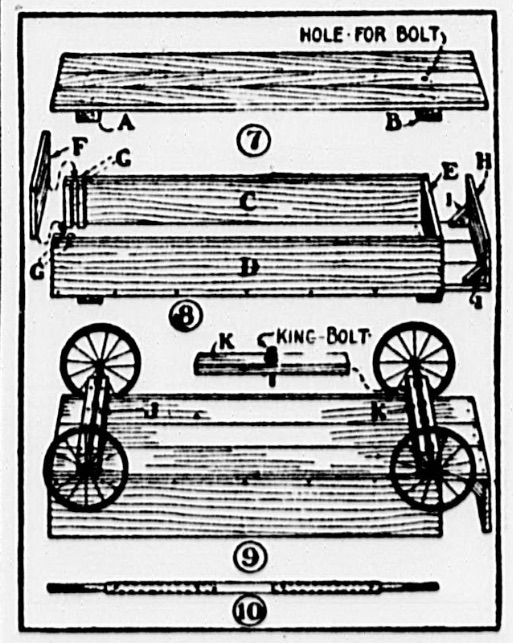
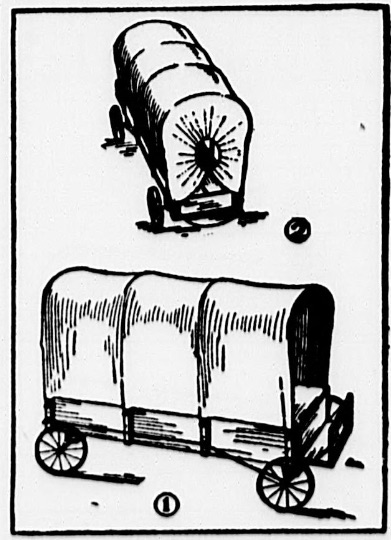
Fig. 3 shows the wagon with the frames for the top covering in position. Separate the ends of four barrel hoops (Fig. 4) for the arched tops of the frames (L, Fig. 5), and nail each to a pair of stick uprights (M). Then nail a pair of wedge-shaped blocks (N, Fig. 5) to the uprights, to when the frames are nailed to the wagon box sides, the uprights will slant outward (Fig. 3).
Make the front seat out of a board, with cleats nailed across its under side (Fig. 6) to fit close against the sides of the wagon box. This seat must be removable if you intend to use the wagon to sleep in.
Figs. 1 and 2 show how to attach lines to the axles, and carry them around the sides, through screw eyes, to the back, for steering when pushing the camp wagon. Another pair of lines may be provided for pulling the wagon.
Source: The Hayti herald. (Hayti, Mo.), 19 Dec. 1918.
