Drying corn was a practical way to preserve one of the garden’s best crops for the months ahead.
The United States Department of Agriculture offered careful instructions for turning sweet corn into a dried product that, according to the old report, could rival canned corn. The key was timing: the corn had to be picked while still in the milk stage, prepared quickly, blanched, cut from the cob, and dried without interruption.
But there was one warning for anyone relying on sunshine alone. The sun could help, but it usually could not finish the job. To keep the corn from souring or spoiling, the drying had to continue with steady heat until the kernels were hard, glassy, and ready for storage.
The following article was originally published in 1920 and offers instructions on how corn was dried at home.
Sun Big Factor in Drying Corn
A vegetable which, when dried, is above criticism even by the most critical, is corn. Other kinds of garden products may or may not be liked by many people, but dried corn is the equal if not the superior of canned corn and can be used for practically as wide a variety of purposes.
The following directions for drying it are those advised by the United States department of Agriculture.
Any of the varieties of sweet corn having qualities desirable for table use will make a good dried product. Corn intended for drying should be gathered when in the milk stage, before glazing and hardening have begun and when the corn is in an ideal condition for immediate table use. It should be gathered only as it can be prepared for drying, as corn deteriorates rapidly.
Careful Preparation Essential
Husk the ears and trim with a knife to remove any injuries. The silk need not be removed, as it can be readily separated from the corn after drying.
Place the ears in wire baskets or wire-bottom boxes and plunge into boiling water for 8 to 12 minutes, or until the milk is set. A little salt may be added to the water if desired.
Divide the corn into older and younger lots before blanching, as the younger ears required somewhat longer cooking than the older ones.
After cooking, remove corn from the water, allow it to drain and cool sufficiently to be handled and cut from the cobs with a strong, sharp knife, taking care that none of the cob is removed with the kernels. The plumes or the hull attachments at the tip of the grains are easily screened out after the corn becomes dry.
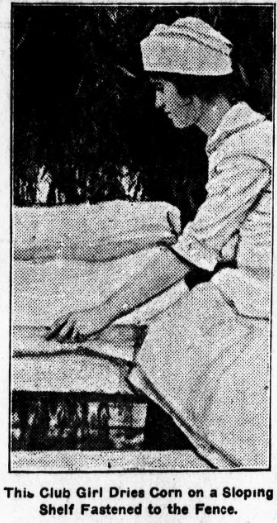
Spread the kernels upon trays to a depth of one inch if drying is done in a drier, or one-eighth to 5-eighths inch if the corn is to be dried in the sun. Stir the grains thoroughly several times during the drying to break up any compact masses.
Sun Factor in Drying Corn
It is practically impossible to bring corn to a sufficient degree of dryness by the unaided heat of the sun. If corn is dried in the sun it should be finished by pouring into bread pans, placing in the oven of the stove, and warming to 160 degrees to 165 degrees F for two hours.
Whether the drying is done in the sun, in a cook-stove drier, or in a commercial drier, it should be continued until the grains are hard, semi-transparent, and will break with clean, glass-like fractures if crushed.
Before storing, free the corn of silks, glumes, and bits of cob. This may be done by pouring the corn from one vessel to another in a strong draft.
When the corn is dry, store in closely woven muslin bags or heavy paper bags. Tie tightly at the neck and place within a large bag, which also should be tightly tied.
Do not allow the drying process to stop from the time it is started until the corn is fairly dry. Corn is a product which contains considerable sugar and protein, and if the drying process is allowed to stop, bacteria are apt to develop and souring take place.
Protect it from insects.
If sun drying is interrupted by cloudy weather or showers, remove corn to the stove and continue drying or the product may spoil.
Source: The Idaho Republican. Blackfoot, Idaho. November 24, 1920.