The following article was originally published in 14 and describes how kids and parents used to make homemade stilts for play.

Homemade Stilts
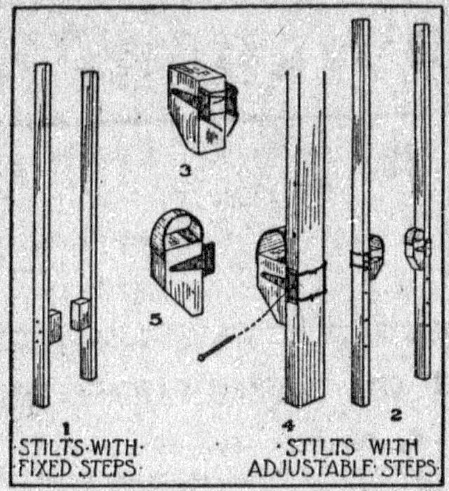
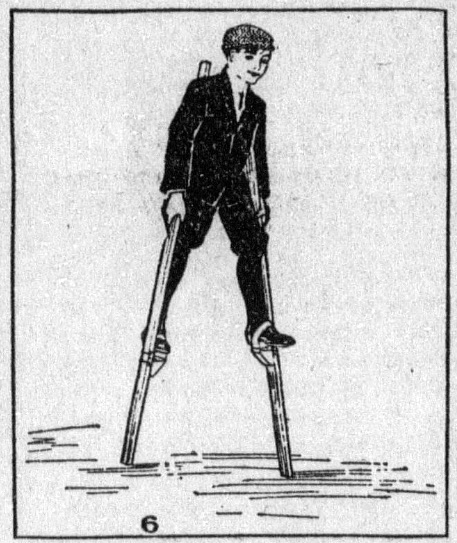
The common form of stilts made and used by American boys, and shown in Fig. 1, require little or no description. All that is needed is a couple of poles 1 inch thick, 2 inches wide and about 6 feet long, for the uprights, and two blocks of wood 2 inches thick, 3 inches wide, and 6 inches long, for the step blocks.

Have you ever attempted to devise a pair of stilts that may be adjusted to different heights? Fig. 2 shows a pair that is very simple to make. The uprights and step blocks should be of the dimensions given for the common form of stilts. The step blocks will look neater if sawed off on a slant on their lower end, as shown in Fig. 3, instead of being left square as in Fig. 1.
The slide arrangement for the steps is made with two pairs of hinges and some wire. T-hinged are shown in the illustrations, but any other form of hinges that you may have, at least 2-1/2 inches long, and with 3 drew-holes in each flap will serve the purpose. Electric-bell wire will do for the wire. Screw one flap of a hinge (the long flap if a T-hinge is used) to each side of each step block, as shown in Fig. 3, being careful to get those on each step block exactly opposite one another. Run a piece of the bell wire through the top holes of the projecting flaps of the hinges, and another through the bottom holes of the flaps, as shown in Fig. 3. Then slip a stilt upright through the sleeve formed by these wires, the hinges, and the step block, and twist together the ends of the wires close against the stilt upright so as to make a tight fitting sleeve (Fig. 4). The step block will now slide along the upright. To fasten it at different heights, it is necessary to make a hole through the upright at different heights and in the proper positions so a nail can be pushed through the center holes of the hinge flaps, and through the upright, as shown in Fig. 4.
Most boys want toe-straps, and Fig. 5 shows the best way of attaching them to the adjustable steps.

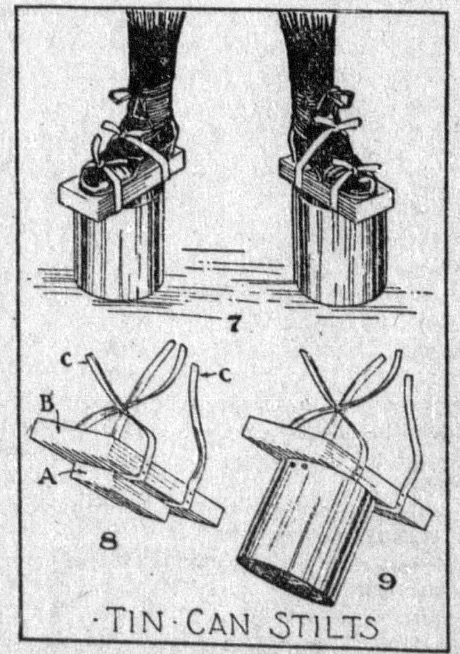
Tin can stilts like those shown in Fig. 7 furnish lots of fun. You can have races in them, and you can use them for making “scent” tracks when playing the game of “Hare and Hounds.” Cut the block A (Fig. 8) of the right length to fit inside of the top of a tomato can. Then cut a block about 4 inches wide and 8 inches long (B, Fig. 8), and after tacking the straps C to it, nail block A to its center. Set block A in the the top of the can and fasten it in place by driving nails through the can into its ends. Straps C may be strips of cloth.
Source: The Meridian times. (Meridian, Idaho), 17 April 1914.

