
The article was originally published in 1921 and it describes how to make plant protectors as well as a watering can out of a large tin can, as well as a dibble.
Garden Helps
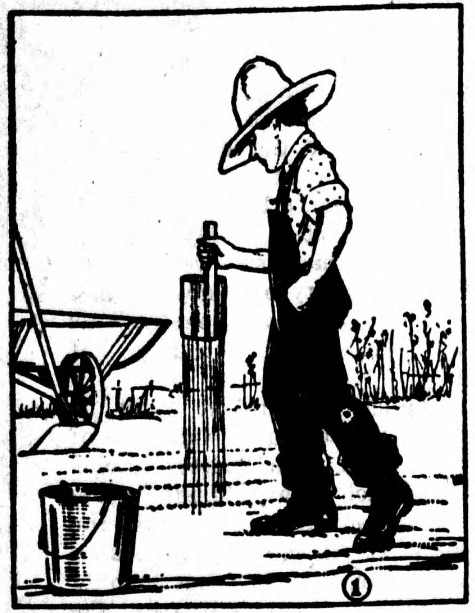
Lacking a sprinkling can, one of the best substitutes I know of is a tin can with perforated bottom and a thick handle fastened to the side (fig. 1). For some purposes this homemade garden accessory is handier than a sprinkling can.
A heavy cord to stretch between stakes to guide you in making straight rows and a hoe, rake or dibble are all the tools you need for planting. Many gardeners prefer a dibble to a hoe or rake for making holes for large seeds, for planting bulbs, and for transplanting seedlings. Fig. 2 shows an easily made dibble. Whittle a stick handle and at one end drive a 16-penny nail through it.
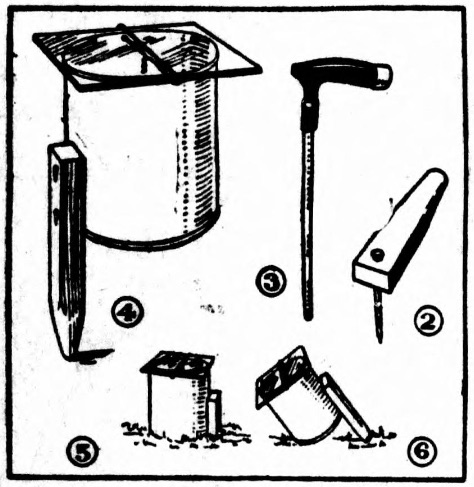
The dibble shown in fig. 3 is an umbrella handle with about one-half of its rod cut off. This is excellent for making holes for bulbs and transplanting. The dibble in fig. 2 is better for seed planting.
Often young tomato plants are nipped by a late frost. The proper protection would have saved them. If planted when the weather is warm the plants must also be protected from the sun’s rays. Figure 4 shows a plant protector that may be used in either case. The glass covered tin can makes a miniature cold frame. Figure 5 shows the protector set close to the ground; fig. 6 shows it raised for ventilation.
Tomato cans are of the best size, and 4×5 inch camera plates are of the right size for glass tops. If you cannot get used camera plates, any broken pieces of glass you can find will do. If the cans have soldered ends, these can be removed by melting the solder; if the ends are crimped on, as most cans are now made, cut the ends open with a can opener. Punch a nail hole in opposite sides of the can near one end, place the glass on the can, pass a piece of wire over it, and stick the wire ends through the holes; twist the wire ends as in fig. 4, and the glass will be held in place.
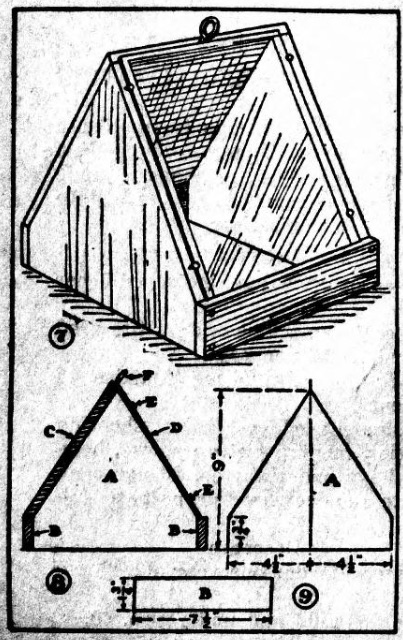
The plant protector in fig. 7 requires more time to make, but it has the advantage of being roomier than that can opener. The size of glass you obtain will determine the size of the parts. I used a 6-1/2 by 8-1/2 inch camera plate, and the dimensions on the pattern of fig. 9 are correct for glass of this size. Go to a paint shop and see what you can get in small pieces of glass.
Figure 8 shows a cross section of the protector. Prepare end pieces A and front and back strips B, and nail them together as shown. Then cut back piece C to fit, and nail it to the ends. The glass rests upon front strip B, and it is held in place by four nails (E) driven into the edges of end pieces A so the heads lap over the glass. The screw eye F in the top edge of piece C helps hold the glass.
Source: The Bottineau courant. (Bottineau, Bottineau County, N.D.), 15 Sept. 1921.
